We successfully created a blog in our local environment in the first part of this tutorial. Now it’s time to share it with the Internet. We will levarage Github pages as our hosting environment. Why? Because it’s free!
Github Setup
I’m gonna assume that you already got a Github account, and also installed git in your local machine. You should create a new repository in your Github, name it personal-blog, or any fancy name that you want. For the remainder of this tutorial we will refer to it as personal-blog for the sake of simplicity. Remember to set your repository visibility as public because it’s required by Github (you can actually make it private if you’re willing to pay though).
The next thing you want to do is to push your local source code to the newly created github repository. You need to cd into your personal-blog folder, and then run these commands
$ git init .
$ git remote add origin git@github.com:{yourGithubName}/personal-blog.git
$ git push -u origin master
Replace {yourGithubName} with your chosen Github name when you created a new account. If you’re working on main branch, then replace master with main. For the remainder of this tutorial I’m gonna assume we stick with master as our primary branch.
Github Action
Access your newly created repo in Github, you’ll see the codes being pushed to master branch. Now we’re gonna add a Github action hook so that every time we push new stuff to this master branch, Github will help us build and deploy our blog. Create a new file under personal-blog/.github/workflows/gh-pages.yml and fill it with this content
name: github pages

on:
  push:
    branches:
      - master  # Set a branch to deploy
  pull_request:

jobs:
  deploy:
    runs-on: ubuntu-20.04
    steps:
      - uses: actions/checkout@v2
        with:
          submodules: true  # Fetch Hugo themes (true OR recursive)
          fetch-depth: 0    # Fetch all history for .GitInfo and .Lastmod

      - name: Setup Hugo
        uses: peaceiris/actions-hugo@v2
        with:
          hugo-version: 'latest'
          # extended: true

      - name: Build
        run: hugo --minify

      - name: Deploy
        uses: peaceiris/actions-gh-pages@v3
        if: github.ref == 'refs/heads/master'
        with:
          github_token: ${{ secrets.GITHUB_TOKEN }}
          publish_dir: ./public
Note that the target branch is specified as master here. This action hook will build your blog every time your master branch is updated, and the built artifacts will be deployed on another branch called gh-pages. Commit this action hook to your repository by running these commands
$ git add .
$ git commit -m "Add gh-pages action hook"
$ git push -u origin master
Github Pages
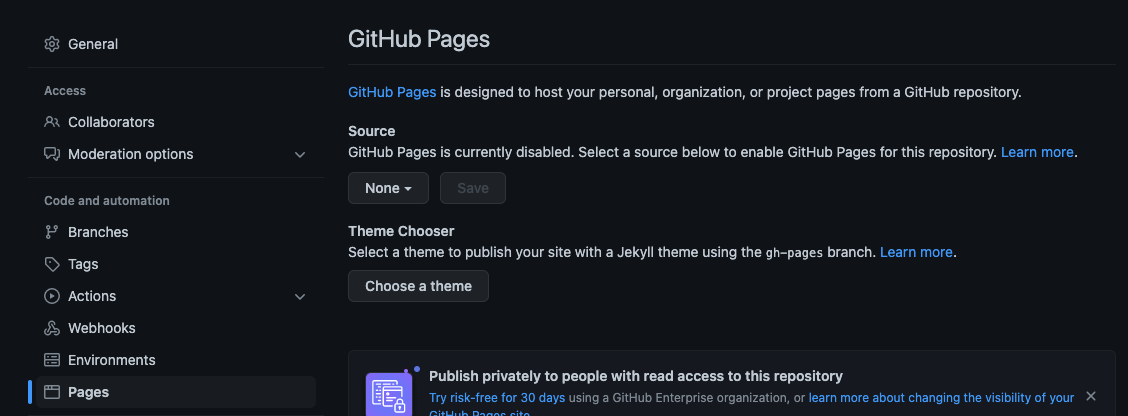
Now you should access your Github repository, go to Settings, and then Pages. You should see something like this
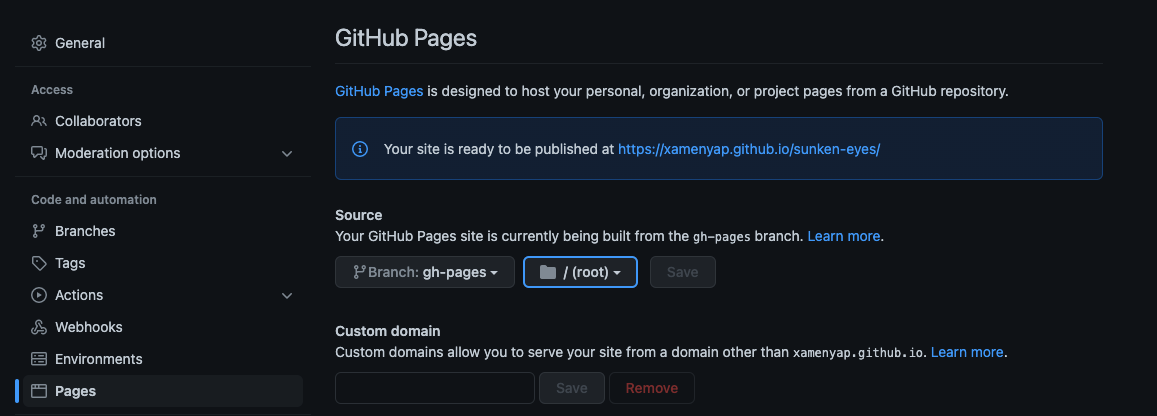
Under Source you need to select branch gh-pages, and select folder root, and then finally click Save. Wait for a few seconds, and you should see this
Config Update
Your blog can now be accessed by netizens via the link in the blue box! Note that in your case the Github name should not be xamenyap (unless you’re my doppelganger), and your repository is probably not sunken-eyes. If you follow this tutorial strictly then the URL for your blog post will be https://{yourGithubName}.github.io/personal-blog with {yourGithubName} being whatever you used during the registration process.
What you need to do next is to update your blog base url in configuration file config.toml
baseURL = https://{yourGithubName}.github.io/personal-blog
And then you will need to commit this change, and push it to master branch
$ git add .
$ git commit -m "Update baseURL in config file"
$ git push -u origin master
Wait a few minutes for Github action to work its magic, and then access the awesome blog you just created via https://{yourGithubName}.github.io/personal-blog :) In the next post we will deploy our blog using our chosen domain, but still hosting on Github.